Monday 21 July 2014

Damn base: Screw you!

That was not meant to be rude, it is merely a follow up to this article.

Now to explain how to make screw bases. As far as I can see it there are two ways, and I will explain one here, the second I will explain as soon as I get the vital bit missing for the project...


You will need:

- wood of two different thicknesses
- an 8mm wood drill bit
- an 6mm wood drill bit
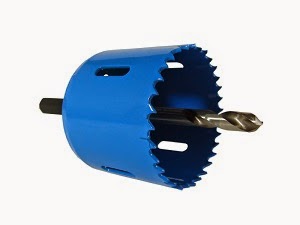
- a core drill with two different diameter settings at least -> the smallest diameter will be the actual surface of your base, the larger one will allow you to make a nice lip at the bottom of your base.


- obviously: a drill (if you have a column/press drill this is even better and lucky you!)
- PVA glue
- a 6mm inside diameter octogonal nut
- a 6mm diameter wingbolt


- a couple of clamps
- some felt in a colour of your choosing
- kitchen roll paper
- scissors
- a hole punch (can be replaced at a pinch by the scissors)

Now what to do?

1) Cut out two discs using the core drill, one of each of your chosen diameters. I use the thicker wood for the main body of the base, and the thinner one for the bottom edge.


2) Using the 8mm drill bit enlarge the hole on one side of the thickest piece of wood. Then hammer the nut into this hole so that it ends flush with the wood surface:


3) Smear some PVA glue on the nut side, do nit get glue too close to the nut itslef:

4) Use the wingbolt to align the two pieces of wood together and clamp them using... the clamps! simple really... :
Here you can see the use of the wingbolt to align the pieces, th block of wood in the red rectangle is of roughly the same thickness as the shelves in the transport case

[optional step] 4b) If your core drill has made a hole all the way through your base, then glue the end of a dowel of the appropriate diameter in and let it dry. Then simply file away the excess dowel:


5) Now get your felt and cut a square a little bigger than the diameter of the underside of your base. Then using a hole punch: punch a hole of the desired diameter roughly in the centre of this square:


6) Now smear PVA glue all over the underside of your base in a thin homogenous layer, use the kitchen roll to help achieve this, and do not hesitate to go all the way to the edges to avoid having the felt tear off at the edges in the future...:


7) Next, place your felt on the PVA glue, taking care to line up the holes, then stick it under something heavy for half an hour or thereabouts:


8) Neatly trim the felt:


Yey! Now for colours
(well black anyway in my case)

9) Use the wingbolt as a handle to hold the base while you spray it in the colour of your choice:


And if you aren't stupid like me you won't forget to wear a glove...

And there you have it! Simple really wouldn't you say? The other option involves flanged hammer-in nuts but I haven't got any yet, so I won't tell you they are good or not: I don't know; but this system works I am certain.

Here is how in pictures:

I don't bother spraying the tops of bases until I have actually built up whatever scenery and details are going to figure on it

It is well and truly fuc-erm: screwed!


Hope this is of help, and answers the queries about how I fix my minis in my new transport case!

Happy DIY to you all!

Fecking Vermin everywhere!!!

Just to share the Studios latest finish piece: a slightly converted skaven rat-ogre.

This guy was joyous! Also I experimented extensively with oil washes and for a first time I tried out dry pastel pigments: bloody brilliant stuff! (I'm working on the tutorials at the moment ;) )

So here he is in all his mangy - uhm - "glory":


 CMON score

Happy Painting to all!

Saturday 19 July 2014

Boxing Day!

Sorry if you thought you had missed Christmas!

Ok ladies and gents !
Today it is a bit of DIY. Specifically a transport box for your prized possessions. Recently my pieces have been becoming more and more complex, with weird bits sticking out all over the place. For this reason I can no longer reliably use transport cases such as Citadels or others similar. I needed a transport system where NOTHING touches the models inside. SO after having skimmed the web and picked up a few ideas I planned out my own box.

Here, in a photo step-by-step, the method in which I went about it and a few things I would change if I had to redo it.

First a few useful things to remember:

- measure twice: cut once
- don't hit your thumb unless you derive some weird satisfaction from inflicting bodily harm to yourself (and if you do I have nothing to do with that right? :p )
- sawdust and other workshop dust can be nasty stuff so please wear appropriate protection


I had the various pannels cut to measure at my local DIY store. This makes life so much easier and with their gear they will (theoretically) always get the angles right.

When building up the box it is much easier to hammer your nails into one of the pannels about half way. This way you will not feel as though you need a third hand when holding two bits of wood, a nail, a hammer, and praying you won't hit your thumb...

Along the edge that has not been prepared with nails lay down a line of PVA glue. Not only will this make the construction a bit tougher, but it will also make the joint slightly watertight.

First two boards assembled! Now for all the rest... One board is slightly longer than the other so as to support the front of the box at the end of the construction.

And the third... You get the picture right? Same for the fourth...

It is now time to fix the back of the box. Exactly in the same way as the sides were assembled: pre-nail the pannel that will be the back, and put PVA glue around the the other boards at the point of contact. 

the main body is now finished. 

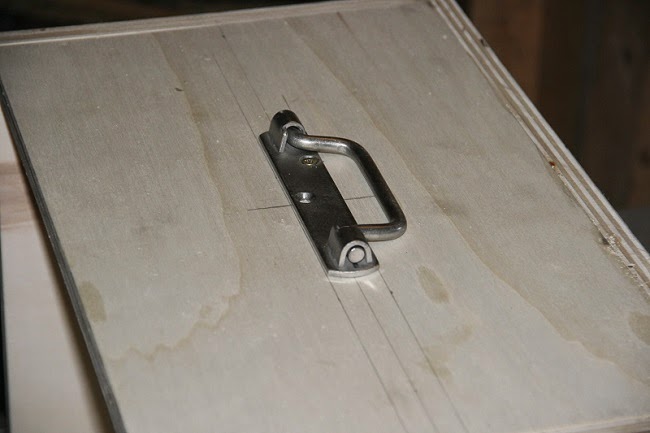
I trace the centre line across the top of the box to fit the handle dead centre

I picked up a basic handle from the DIY store for this. Simply screw it into th wood. If you are really paranoid you can drill through the top of the box and actually bolt the handle to the top.

Time to screw the closing clasps. Remember to always tighten both screws progressively together (so go back and forth between screws until properly tightened)

Check once again that all is properly aligned... then screw the second part of the clasp on. I put the flat part on the actual "door" of the box to be able to store it flat.


The box itself is finished. In the little red circles you will see that if I had thought a bit better I would have left two little bits of the "door" so as to better lock into place. But it still works so hey! :)
next trace out a grid of 2x2cm squares on a new piece of wood that corresponds exactly to the inside dimensions of your box. Then drill out alternate holes (like the orange circles ;) ), I recommend using an 8mm drill bit.

Because I'm needing two shelves and I don't want to waste time drawing two grids: I clamp both boards together and drill through them both at the same time.

The finished boards.
carefully round of the edges of the shelf supports.This will make it easier to slide the shelf into the box. 
all the shelf supports ready
once again: some PVA glue for extra resistance.
first fix all the LOWER supports, on both sides of the box (note that the length of the supports is a couple of centimetres shorter than the depth of the box)
Then place the shelf on its supports and fix the second set of supports. IMPORTANT: as soon as you have fixed the supports -> remove the shelf just in case a small speck of glue is touching said shelf and therefore making it impossible to pull out later.

As a finishing touch: fix some form of small shock absorber to the underside of your box. These can be found in any DIY shop, usually near the kitchen furniture random stuff.

And there you have it. Not too hard really :)
I hope this helps any of you setting out to build your own box :)

A few pictures of the finished product:


Now to paint it... :D


 Happy DIY people and have a lovely week end!